
How to add a worker in Prodio?👷

In this article, you'll learn how to add a worker and what data you can assign to him
Where can I find this?
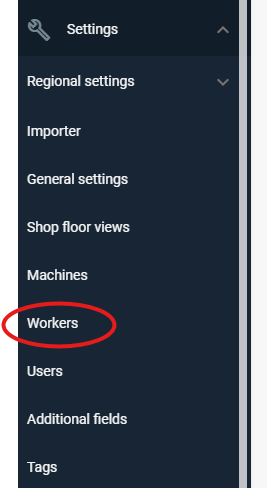
To add a worker, go to the "Settings", and then select "Workers" 🖱️
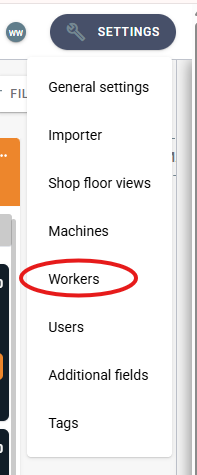
You can also find this trough the "Settings" in the upper right corner and then "Workers"
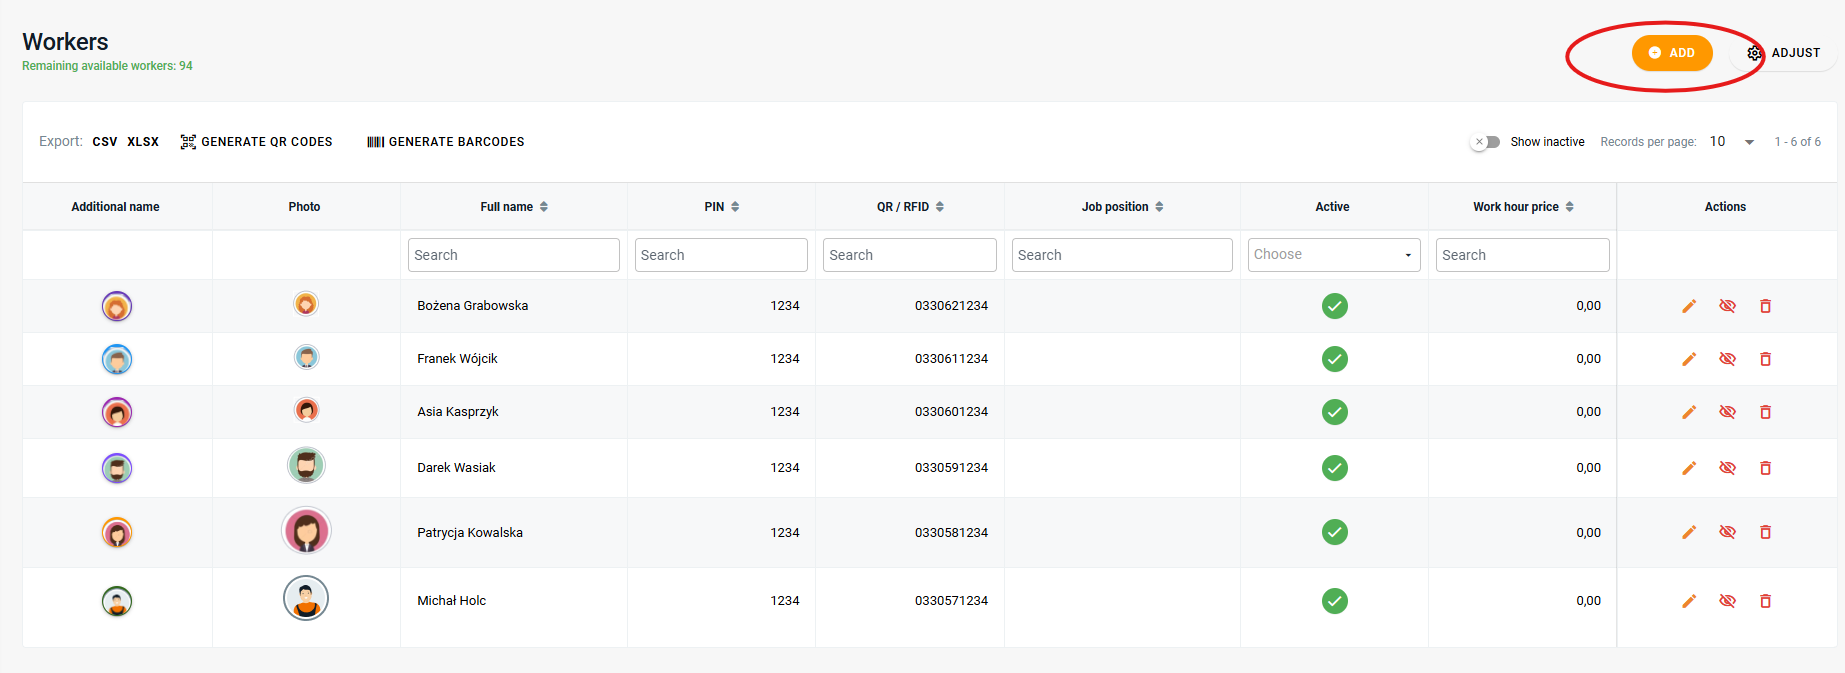
It will show us the tab with all the workers, who are already in the system. To add new one you have to click on the orange button "Add" in the upper right corner.
How does it work?
After clicking, a window will open to add a worker. There are a few fields to fill out ✍️
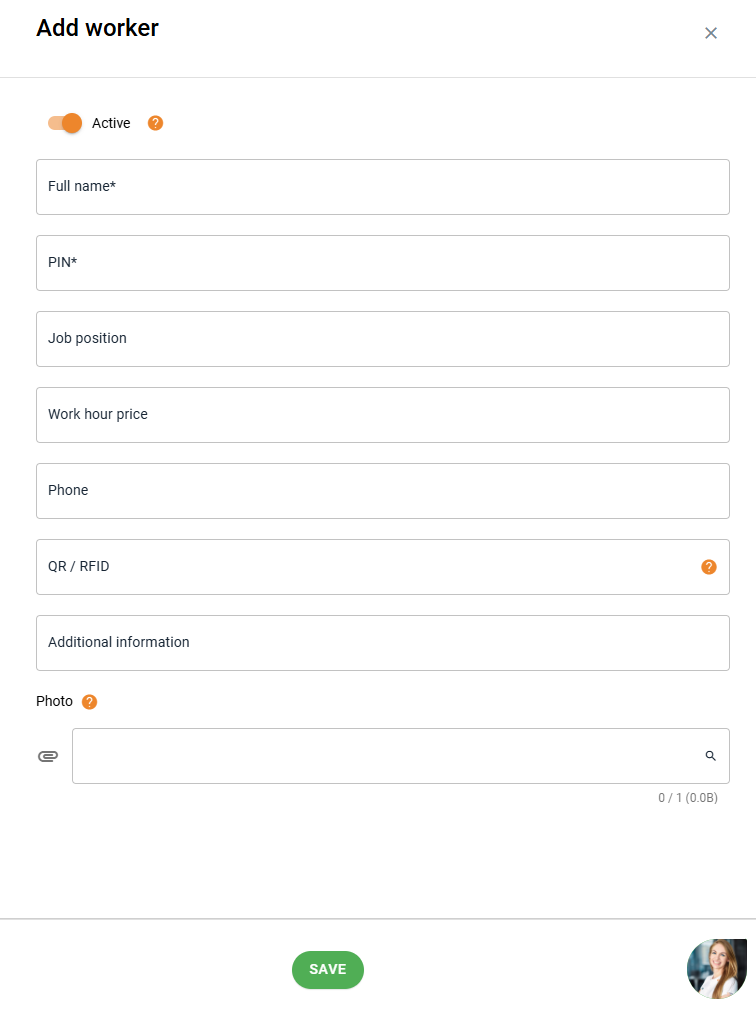
The only mandatory fields are the worker's first name, last name, and PIN.
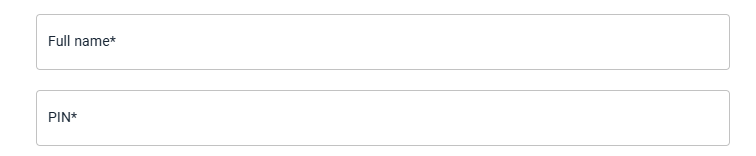
Pin is obligatory so the worker could register his work on anufacturing tasks or clock-in and clock-out.
Another available field is "Work hour price" If you fill in this field, you’ll be able to calculate the worker's cost both for specific manufacturing tasks and for the order💵
Job position, phone and additional information are only to keep all needed information in one place. It can be useful if you have a lot of workers.
Adding a photo is also optional. It will show for exapmle on work schedule if the worker will be assigned to task or if you would like to generate qr codes or barecode. This ocds with photos can also be used as ID cards for workers - you can check how to do it HERE :)
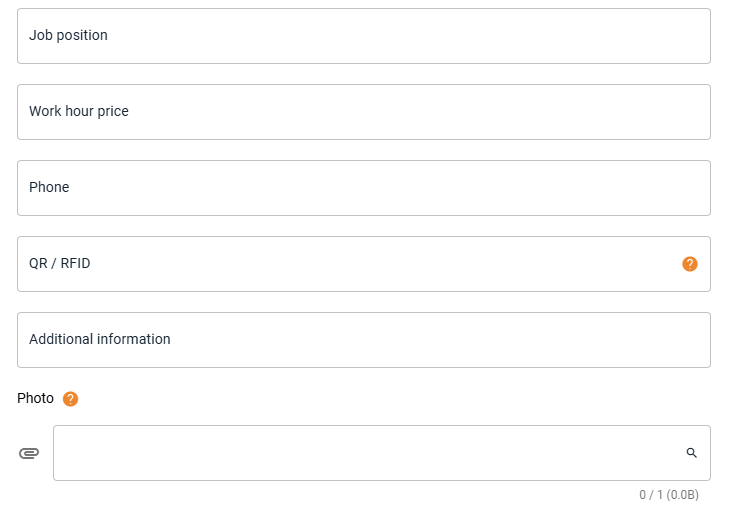
There is also the "QR/RFID" field. We will need that only if you want to use the RFID reader for workers. They can use that to register their work. You will know how to do it from HERE :)
If you don't want to use that option, you just leave this file blank - it will fill itself after saving.
When we will have all the information that we wanted click "Save" and we are done!
Worker is added to Prodio and ready to logging their work. 😁
#TIP- if you want to know how the worker should register their work in Prodio, you can look here: Employee Manual: How to Log Your Work in Production?
High five 🙋♀️ - team Prodio!
Prodio is a user friendly production planning software for small manufacturers.